

Key Takeaways
- Your home has two separate plumbing systems: one that brings fresh water in and one that carries wastewater out.
- Knowing the location of every shutoff valve in your home is the single most important plumbing skill you can have.
- Several common plumbing issues - dripping faucets, running toilets, slow drains - are manageable DIY repairs.
- Work involving pipes inside walls, gas lines, or sewer connections typically requires a licensed professional.
- A small toolkit and some basic knowledge can prevent minor issues from becoming expensive emergencies.
Start here
How Your Home's Plumbing System Works
Next
The Shutoff Valves You Need to Know
Then
Simple Fixes You Can Safely Do Yourself
Important boundary
When to Call a Licensed Plumber
Get equipped
Building Your Basic Plumbing Toolkit
How Your Home's Plumbing System Works
Your home's plumbing is made up of two distinct systems working in opposite directions. The supply system delivers pressurized fresh water from the municipal main (or a private well) to every faucet, toilet, and appliance in your home. The drain-waste-vent (DWV) system uses gravity to carry wastewater away to the sewer or septic tank, while vent pipes release sewer gases safely through the roof.
These two systems never mix - and understanding that separation helps you diagnose problems faster. A low-pressure shower is a supply-side issue. A slow-draining sink points to the DWV side. Water supply pipes are typically copper, CPVC, or PEX tubing. Drain pipes are wider and made of PVC or, in older homes, cast iron.
Supply system
The pressurized network of pipes that delivers fresh, clean water from the municipal main or well to faucets, toilets, and appliances throughout your home.
Drain-waste-vent (DWV) system
The system of larger pipes that uses gravity to carry wastewater away from fixtures to the sewer or septic tank, while vent pipes release gases safely through the roof.
Shutoff valve
A valve that stops water flow to an entire house (main shutoff) or to a single fixture (fixture stop). Knowing their locations is essential for handling plumbing emergencies.
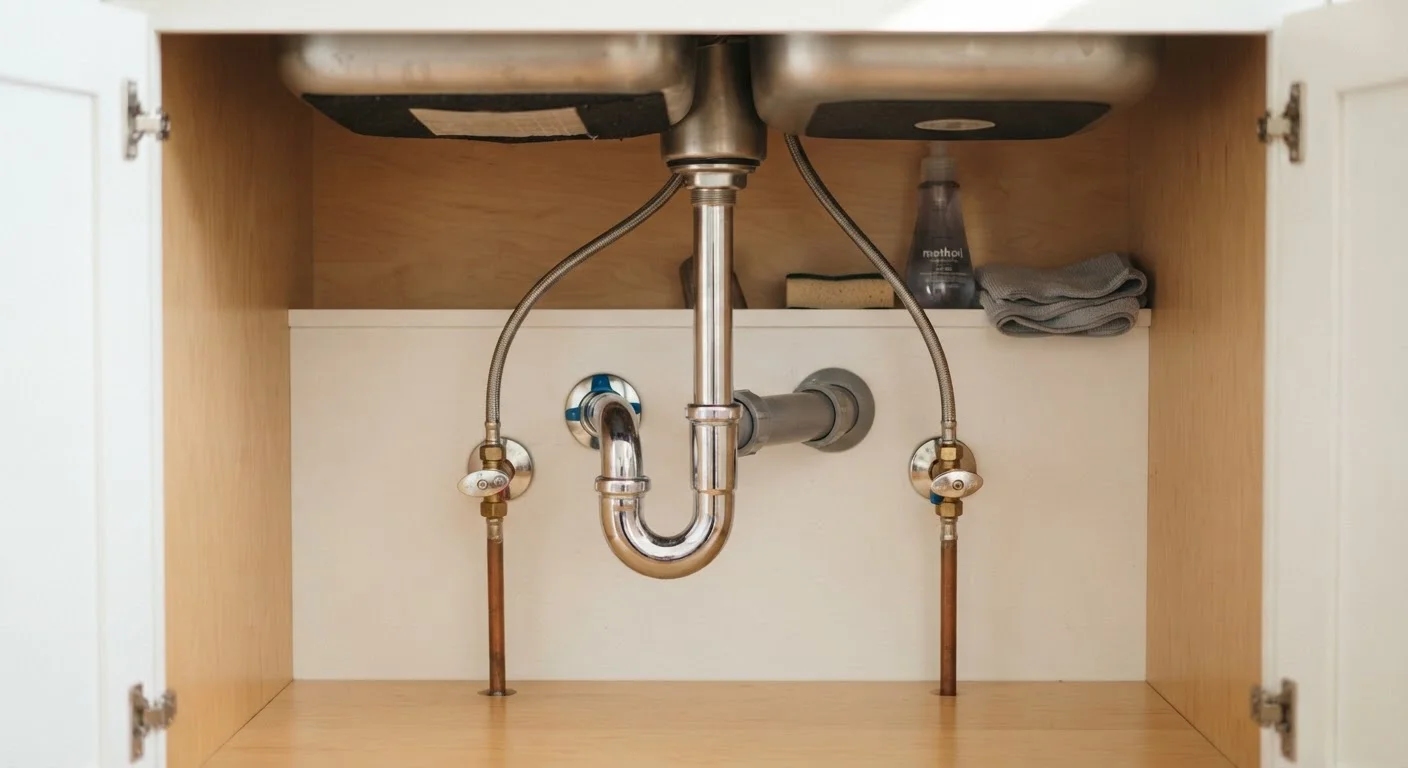
P-trap
The curved section of pipe beneath a sink that holds a small amount of water, creating a seal that prevents sewer gases from entering the home through the drain opening.
Aerator
A small screen fitting screwed onto a faucet spout that mixes air into the water stream. Mineral deposits can clog it and reduce water pressure from that faucet.
Flapper
The rubber seal inside a toilet tank that opens to allow water into the bowl during a flush, then closes to allow the tank to refill. A worn flapper is a common cause of a constantly running toilet.
As part of settling into a new home, it's worth pairing plumbing knowledge with a full household orientation. Our household setup checklist covers additional systems to inspect and document when you first move in.
The Shutoff Valves You Need to Know
If you learn nothing else from this guide, learn your shutoff valves. Acting quickly when a pipe bursts or a fixture starts leaking can prevent thousands of dollars in water damage.
- Main shutoff valve: Controls all water entering the house. Usually located where the supply line enters - often near the water meter, in a basement, crawl space, or utility room. In a plumbing emergency, this is the first valve you reach for.
- Fixture shutoff valves (stops): Small oval-handled valves located under sinks and behind toilets. They let you cut water to one fixture without affecting the rest of the house.
- Appliance shutoffs: Washing machines and dishwashers typically have dedicated shutoffs on the supply lines behind or beneath them.
Walk through your home right now and locate each of these. Turn them gently to confirm they move freely - valves that haven't been operated in years can seize or leak when you finally need them.
Make a Valve Map When You Move In
During your first week in a new home, walk through every room and photograph or sketch the location of each shutoff valve. Note the main shutoff, each under-sink stop, and any appliance valves. Store this map with your home's documents or tape a copy inside a cabinet door. In an emergency, anyone in the household can act quickly - not just you.
Simple Fixes You Can Safely Do Yourself
A large share of common household plumbing problems fall well within the ability of a careful, patient first-time homeowner. Here are four repairs worth knowing:
- Dripping faucet: Usually caused by a worn rubber washer or O-ring. Shut off the fixture's supply valve, disassemble the handle, replace the worn part, and reassemble. Repair kits are widely available at hardware stores.
- Running toilet: Typically a faulty flapper or a float set too high. Lift the tank lid and observe the mechanism while flushing. If water trickles into the bowl after the flush cycle, the flapper isn't sealing. Flappers are inexpensive and straightforward to swap out.
- Slow or clogged drain: Try a drain snake or a plunger before reaching for chemical drain cleaners, which can damage pipes with repeated use. A drain strainer prevents hair and debris buildup proactively.
- Low-flow aerator: Mineral deposits clog the aerator screens on faucet spouts. Unscrew the aerator, soak it in white vinegar for an hour, rinse, and reattach.
None of these tasks require cutting into walls or working with pipe joints - the threshold where risk rises significantly.
When to Call a Licensed Plumber
Knowing your limits is just as important as knowing your skills. Some plumbing work is genuinely dangerous, legally regulated, or both - and attempting it without proper knowledge or permits can result in injury, code violations, or problems that are expensive to correct.
Don't Skip Permits on Significant Work
Unpermitted plumbing work can create serious problems when you sell your home, file an insurance claim, or face an inspection. In many jurisdictions, work that modifies the pipe layout or involves the water heater requires a permit and inspection by a licensed professional. Check with your local building department before starting any project beyond basic fixture repairs.
Call a licensed plumber for any of the following:
- Leaks inside walls, ceilings, or under concrete slabs
- No hot water or water heater replacement
- Sewage backups or gurgling drains throughout the house (a sign of a main-line blockage)
- Pipe repairs requiring soldering, gluing new joints, or rerouting lines
- Installation of new fixtures that require extending existing supply or drain lines
This logic mirrors what applies in other home systems. Just as detailed in our guide on when DIY electrical work goes wrong, knowing when to stop and call a qualified trade is protective - not a defeat.
Always verify whether your local jurisdiction requires a permit for the work being done. Your building department's website is the most reliable source for this information.
Building Your Basic Plumbing Toolkit
You don't need a professional's full inventory to handle everyday plumbing issues. A focused starter kit keeps you prepared without overspending.
- Plunger (cup and flange types): A cup plunger works on sinks; a flange plunger is shaped for toilet drains. Having both covers most blockage situations.
- Drain snake (hand auger): Reaches clogs too deep for a plunger, particularly in tub drains and kitchen lines.
- Adjustable wrench and slip-joint pliers: For tightening or loosening supply line connections and drain fittings.
- Plumber's tape (Teflon tape): Wraps threaded pipe connections to create a watertight seal when reassembling fixtures.
- Bucket and old towels: Essential for catching residual water in pipes before you open any connections.
- Flashlight or headlamp: Under-sink and behind-toilet spaces are dark; hands-free lighting makes a real difference.
Keeping these items organized and accessible - alongside your home's maintenance records - is a core part of good household management. Knowing where your tools are when something goes wrong can save time and reduce stress considerably.